
COLUMN
05/10/2026
Deploying a Next.js Web Application to Production: A Complete Checklist
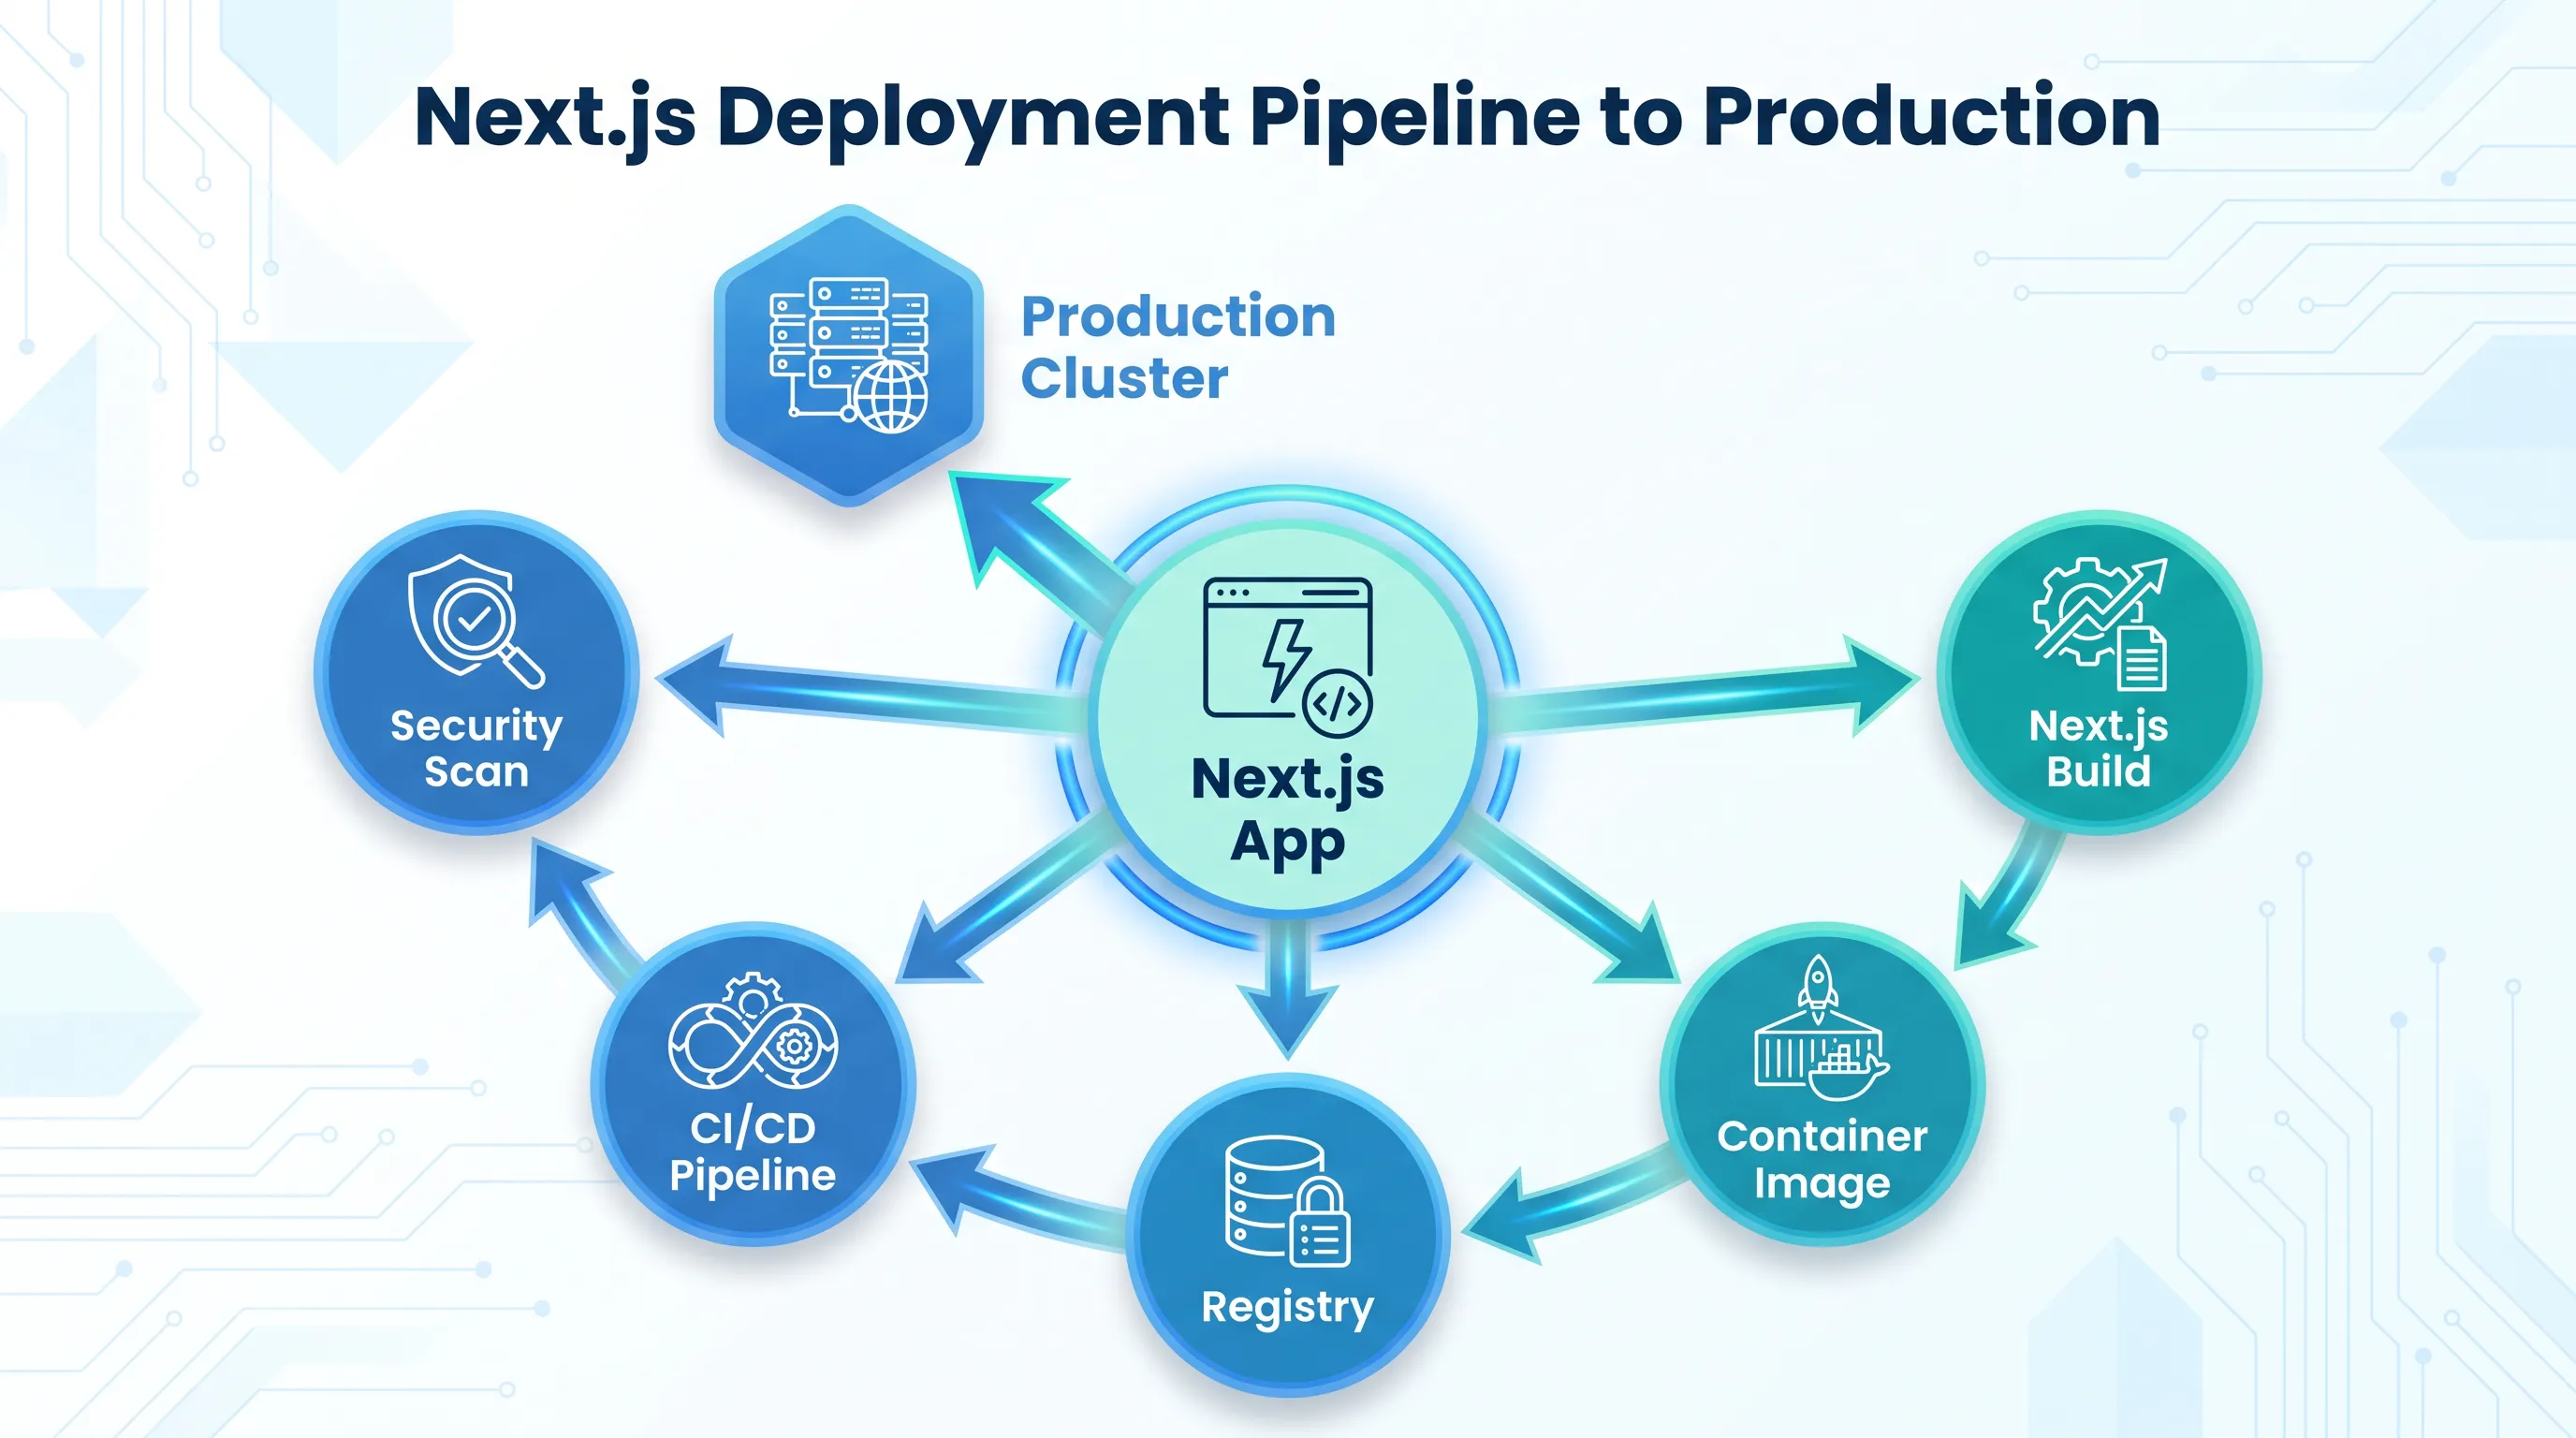
Running next build is the easy part. Getting that build to behave the same way in production, every time, is where most teams improvise — and where the gaps show up weeks later as a 500 error nobody can reproduce locally.
This guide is a practical checklist for taking a Next.js application from "it builds" to "it's running in production." It assumes you're self-hosting rather than deploying to Vercel, since that's where most of the missing steps live.
Build the right output for your deployment target
Before anything else, check your next.config.js. If you're deploying to a container or a VM instead of Vercel, you almost certainly want:
// next.config.js
module.exports = {
  output: 'standalone',
}
The standalone output traces only the dependencies your app actually needs at runtime and copies them into .next/standalone, instead of shipping your entire node_modules. Without it, your production image ends up carrying build tooling, devDependencies, and unused packages — which means a larger attack surface and a slower deploy every time. The Next.js docs on output file tracing cover exactly what gets included.
Put the build in a container you control
Once you have a standalone build, the next step is packaging it. A minimal production Dockerfile looks like this:
FROM node:20-alpine AS base

FROM base AS deps
WORKDIR /app
COPY package.json package-lock.json ./
RUN npm ci

FROM base AS builder
WORKDIR /app
COPY --from=deps /app/node_modules ./node_modules
COPY . .
RUN npm run build

FROM base AS runner
WORKDIR /app
ENV NODE_ENV=production
COPY --from=builder /app/public ./public
COPY --from=builder /app/.next/standalone ./
COPY --from=builder /app/.next/static ./.next/static
EXPOSE 3000
CMD ["node", "server.js"]
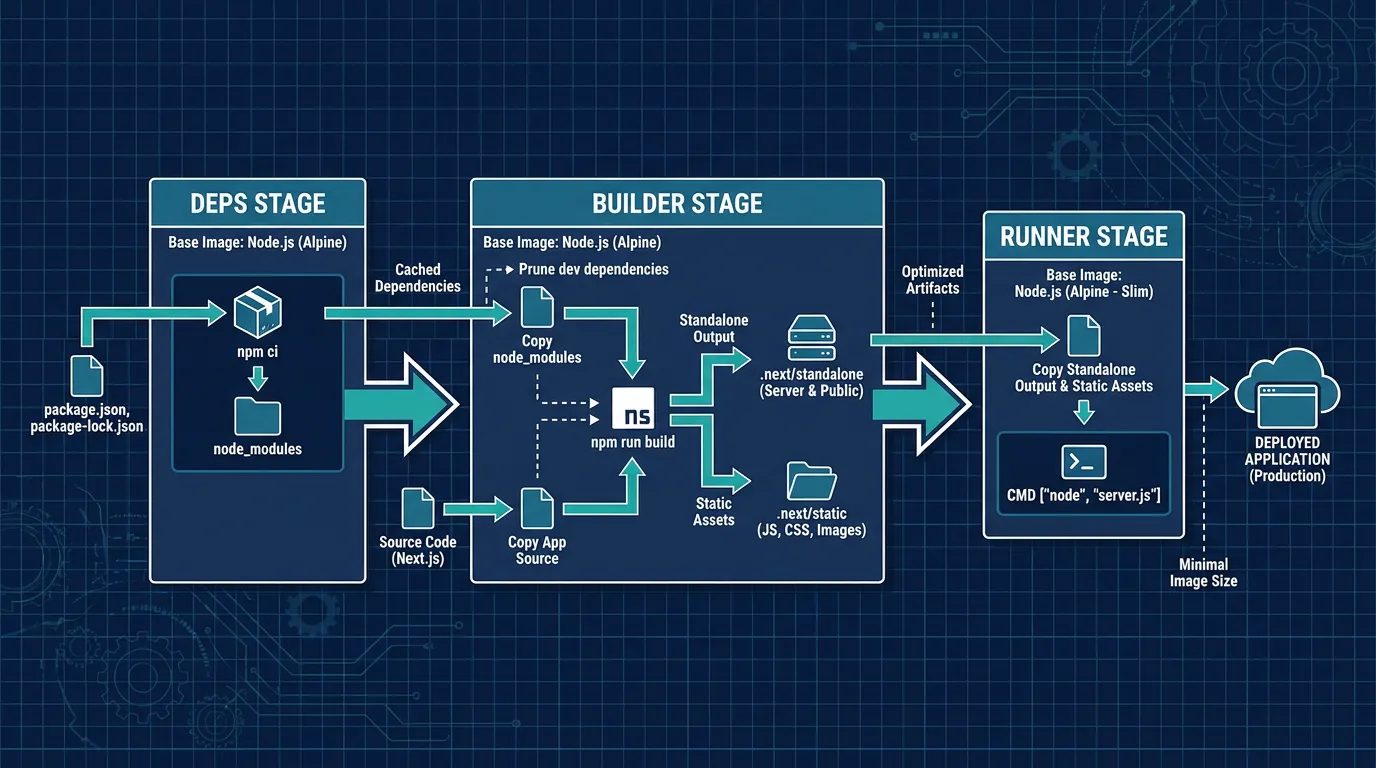
This is a multi-stage build: dependencies are installed once, the build runs in its own stage, and only the standalone output and static assets make it into the final image. The result is a small, reproducible artifact you can push to a registry and run anywhere.
Once images start accumulating — and once more than one person on the team is pushing them — a public registry stops being enough. This is where teams typically add running your own private container registry: access control on who can push and pull, retention policies so old images don't pile up, and a registry that lives inside your own infrastructure instead of a third-party SaaS.
Get environment variables right before you deploy
This is the single most common source of "works locally, breaks in production" for Next.js apps. Two rules matter:
- Anything your browser code reads must be prefixed
NEXT_PUBLIC_and is baked in at build time, not read at runtime. - Server-only variables (database URLs, API keys) should never carry that prefix, and should be injected at container start, not committed to the image.
A common mistake is building one image per environment because a NEXT_PUBLIC_ value changed. If you need the same image to run in staging and production, you either accept that public env vars require a rebuild, or move that specific value out of the client bundle and fetch it from an API route at runtime instead. The Next.js environment variables docs spell out the build-time vs. runtime distinction in more detail.
Automate the path from commit to running container
Manually building and pushing images works for a demo. It doesn't survive a second developer joining the project. At minimum, your pipeline should run npm run build and the Docker build on every merge to your main branch, tag the resulting image with the commit SHA, and push it to your registry.
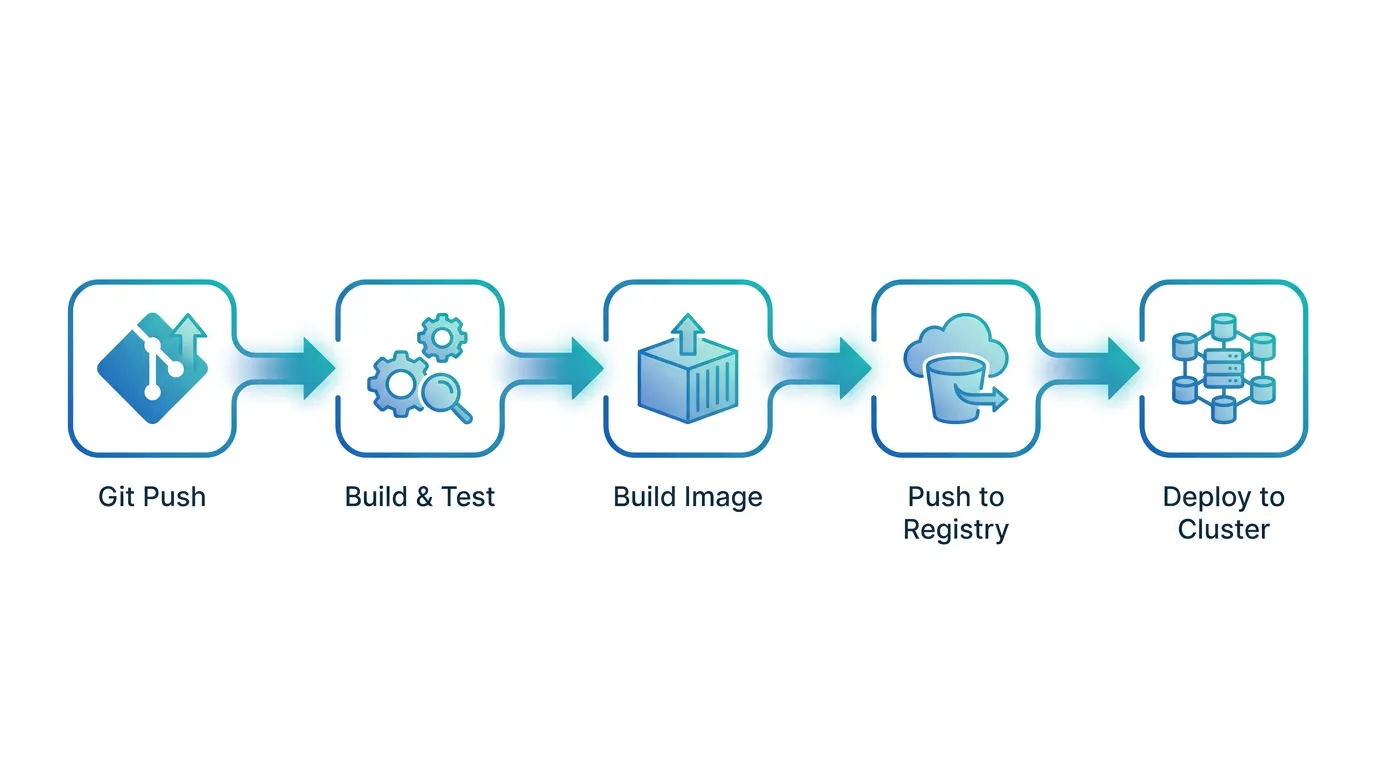
If your deployment target is Kubernetes, automating deployments with GitHub Actions and Kubernetes removes the manual kubectl apply step entirely — a merged PR becomes a running pod without anyone touching a terminal. That matters less for a side project and a lot more the day a teammate pushes a fix while you're on vacation.
Check the image before it ships, not after
A production checklist that stops at "it builds" is incomplete. Before an image goes live, it's worth scanning your images for vulnerabilities before you ship — base image CVEs, outdated dependencies baked into the layer, and secrets accidentally copied into the image during COPY . .. This is a five-minute check in CI, and it's far cheaper than finding out about a vulnerable base image from a security scanner after the app is already serving traffic.
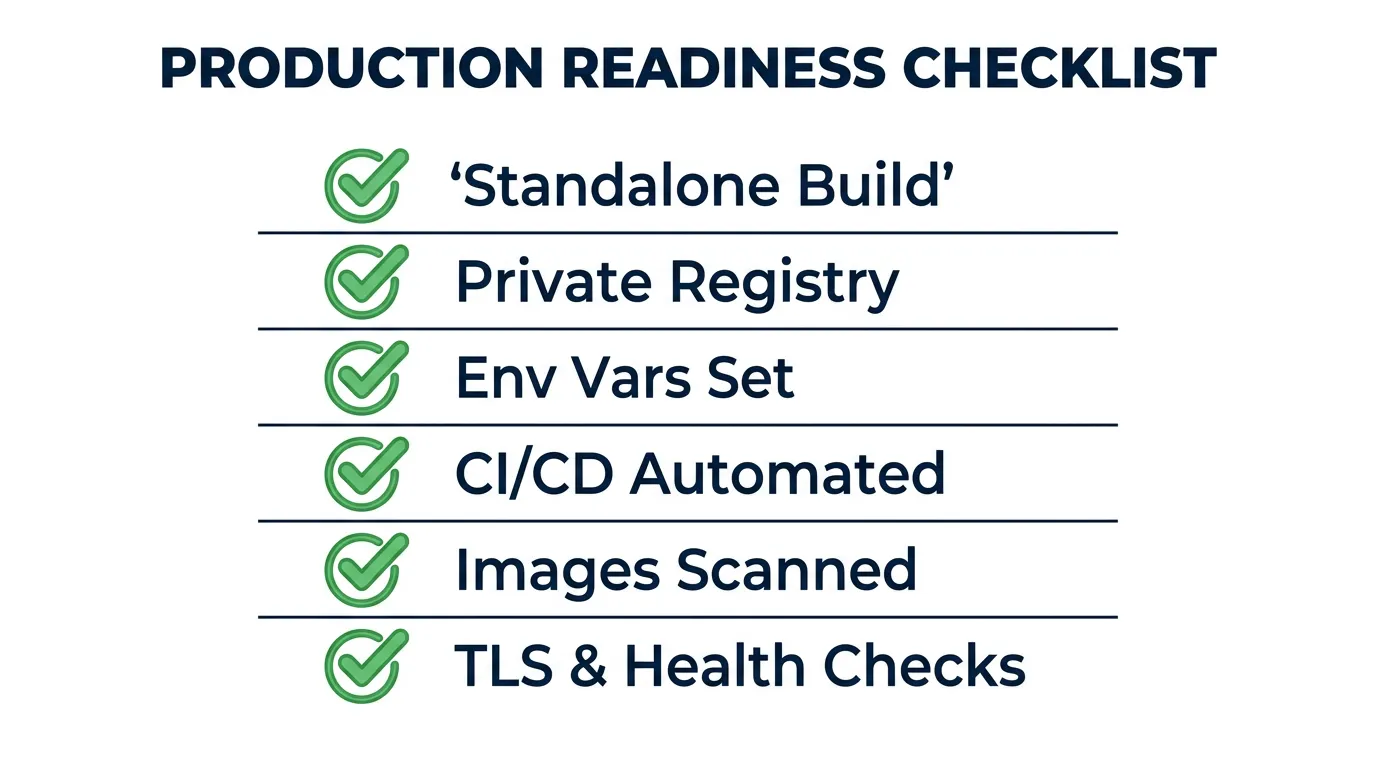
Don't forget TLS and health checks
Two things that are easy to skip and expensive to skip: TLS termination in front of your app, and a health check endpoint your orchestrator can poll. Without the latter, a crashed container can sit "running" from Kubernetes' point of view while actually returning errors to every request. A simple app/api/health/route.ts that returns 200 only when your app can reach its database is usually enough to catch this.
Where this leaves you
None of these steps are specific to one hosting provider — they're the same regardless of whether you run a single VM or a cluster. What changes is how much of it you have to wire up yourself. If you're doing this on bare Kubernetes, you're assembling the registry, the CI/CD pipeline, the scanning step, and the ingress/TLS layer one at a time. Kubo packages that plumbing on top of standard Kubernetes, so the checklist above is closer to configuration than infrastructure you build from scratch — without locking you into a proprietary platform to get there.
If you're assembling this pipeline piece by piece right now, the registry and CI/CD guides above are a reasonable next stop for the parts you haven't automated yet.