
COLUMN
29/09/2026
Next.js Standalone Output: The Right Way to Dockerize for Production
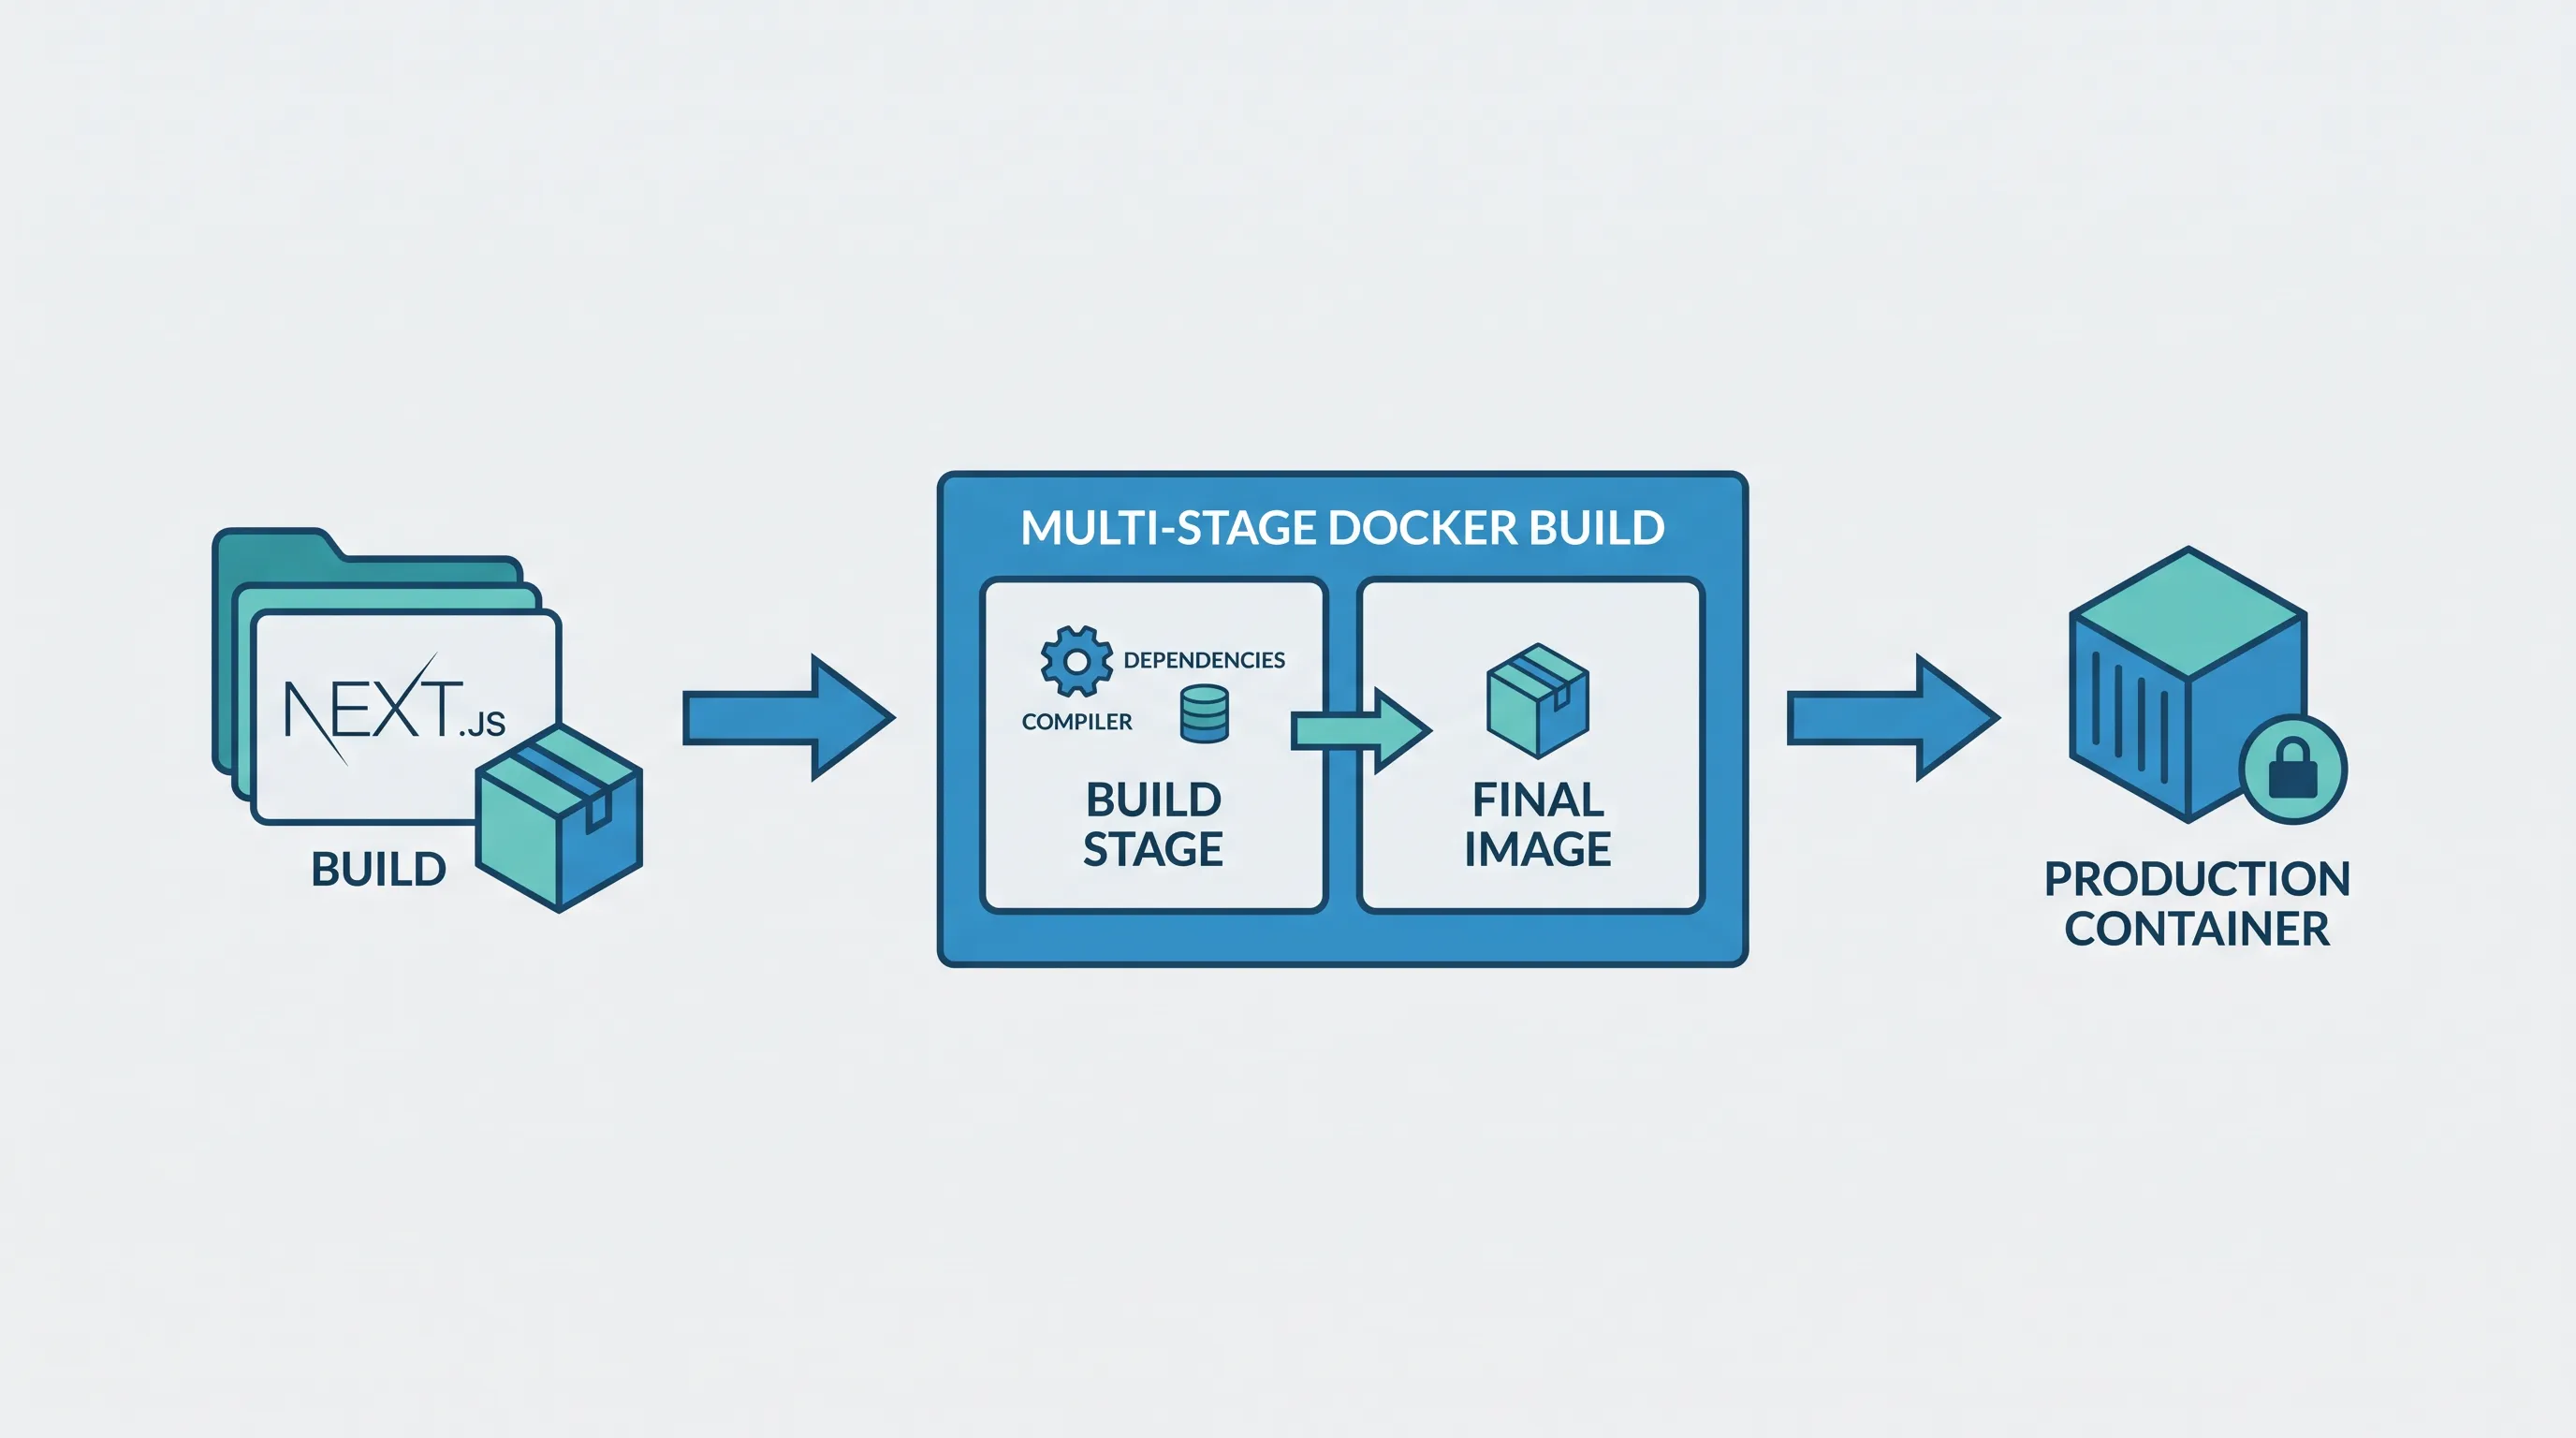
Next.js makes local development effortless, but production is a different story. The moment you need the app to run the same way every time — in a container, on a server you don't control, behind a load balancer — the defaults that made development easy start working against you. The next build output assumes a Node runtime, a full node_modules tree, and a filesystem that looks like your laptop. None of that is guaranteed once you're shipping containers.
This guide covers the standalone output mode Next.js ships specifically for this problem, how to turn it into a small, reliable Docker image, and the handful of runtime details — environment variables, static assets, health checks — that trip people up the first time they do this for real.
Why the default build isn't enough for containers
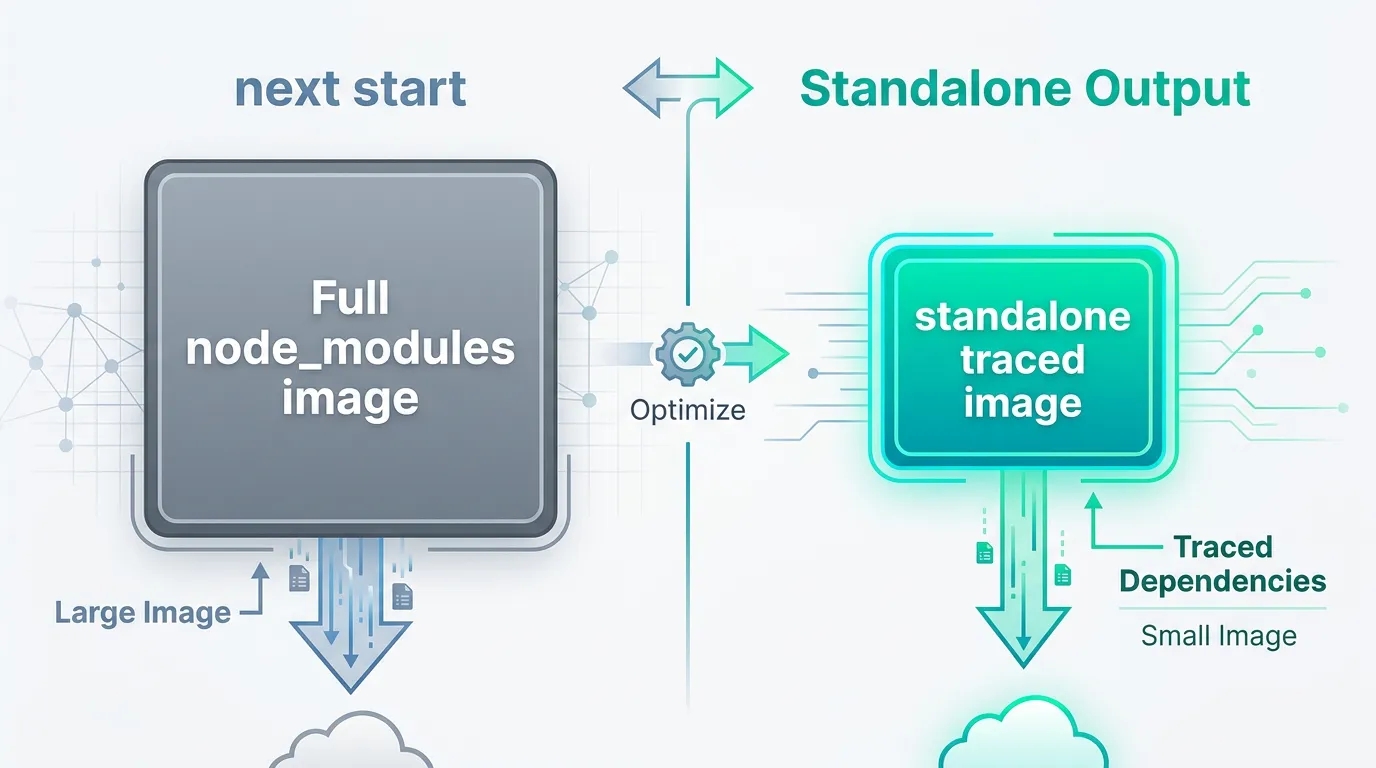
Running next build followed by next start works, but it drags the entire node_modules directory into your image. For a typical app with Next.js itself, React, and a moderate set of dependencies, that alone can push an image well past 500MB before your own code is even in it. Larger images mean slower deploys, slower cold starts on autoscaled infrastructure, and a bigger attack surface to patch.
The deeper issue is that next start was designed for "run this on a machine that already has your source and dependencies," not "run this artifact anywhere." In a containerized deployment, you want the opposite: an image that carries only what's needed to execute, decided once at build time.
Standalone output: what it actually does
Next.js has shipped an output: 'standalone' mode for several major versions now, and it addresses this directly. Enabling it in next.config.js tells the build to trace your app's actual dependency graph and produce a self-contained folder — a minimal node_modules, a small server entry point, and only the files your code really imports.
// next.config.js
module.exports = {
  output: 'standalone',
}
After next build, you'll find the result in .next/standalone. It includes a server.js file that starts an HTTP server without needing the next CLI or your full dependency tree — that's the piece designed to be copied into a container.
The official documentation covers the mechanics and current caveats in detail: Next.js — Output File Tracing.
Two things standalone mode does not copy
The trace is conservative by design, and it skips two directories most apps still need:
public/— static assets like images, fonts, androbots.txtare not part of the server bundle and won't be traced automatically..next/static/— the client-side JavaScript and CSS chunks the browser downloads. These are served separately from the server logic.
Skipping this step is the single most common reason a "successful" standalone build 404s on every page once deployed. Both need to be copied in manually, which is exactly what the Dockerfile below does.
A production Dockerfile
This is a minimal, multi-stage build that keeps the final image small by discarding the build toolchain entirely:
FROM node:20-alpine AS deps
WORKDIR /app
COPY package.json package-lock.json ./
RUN npm ci

FROM node:20-alpine AS builder
WORKDIR /app
COPY --from=deps /app/node_modules ./node_modules
COPY . .
RUN npm run build

FROM node:20-alpine AS runner
WORKDIR /app
ENV NODE_ENV=production

COPY --from=builder /app/.next/standalone ./
COPY --from=builder /app/.next/static ./.next/static
COPY --from=builder /app/public ./public

EXPOSE 3000
ENV PORT=3000
CMD ["node", "server.js"]
Three stages, three jobs: install dependencies once, build with the full toolchain available, then assemble a runner that only has what server.js needs to execute. The deps stage exists so Docker's layer cache can skip reinstalling packages when only application code changes — a meaningful build-time saving once your node_modules grows past a few hundred megabytes.
Environment variables: build time vs. runtime
This is where standalone deployments most often go wrong, because Next.js treats two categories of environment variables very differently, and the difference is invisible until something breaks in production.
Anything prefixed NEXT_PUBLIC_ is inlined into the JavaScript bundle at build time. Once next build runs, that value is baked into static files — setting the variable differently when the container starts has no effect. If you're building one image and deploying it to staging and production with different public API URLs, this will bite you: the value from whichever environment built the image is the one every environment gets.
Server-only variables (no NEXT_PUBLIC_ prefix) behave the way most people expect — they're read at request time from process.env, so setting them at container startup works fine.
The practical implication: if a value needs to differ per environment and is used in client-side code, either build a separate image per environment, or restructure so the value is fetched at runtime (an API route, a server component) instead of being embedded as a public env var. The Next.js documentation on environment variables covers the loading order and bundling rules in more detail.
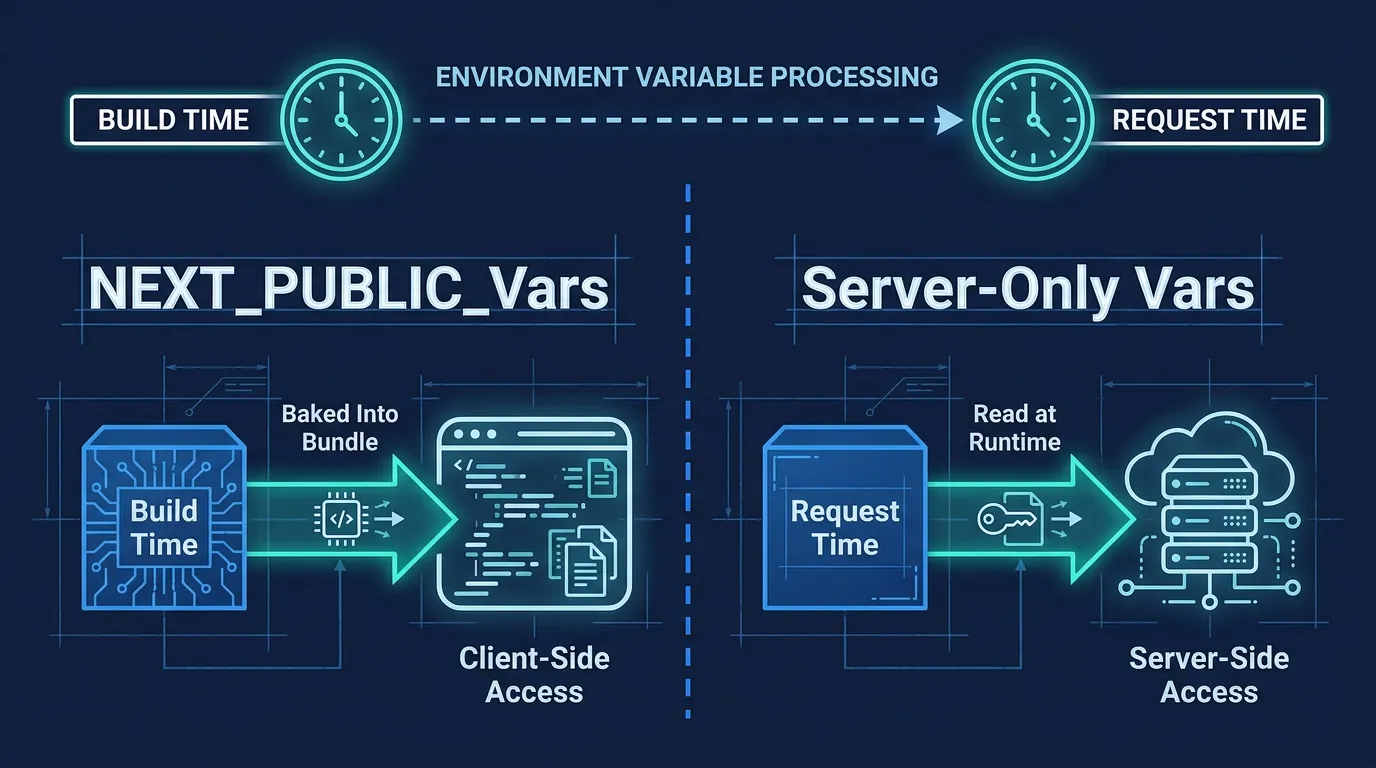
Image optimization needs a runtime, too
The built-in next/image component optimizes images using a Node-based image processing library at request time by default. That works fine with next start, but it's easy to overlook in a standalone container: the optimization step still runs inside your container on every unique image request unless you explicitly configure a different loader (a CDN or external image service) via the images.loader setting. If your container is small and CPU-constrained, this can become a surprising bottleneck under load — worth load-testing before you assume the default is "good enough" in production.
A minimal health check
Once this is running behind a load balancer or an orchestrator, something needs to verify the process is actually serving traffic before routing to it. A plain route handler is enough:
// app/api/health/route.js
export async function GET() {
  return Response.json({ status: 'ok' })
}
Point your platform's liveness/readiness probe at /api/health. It's a small addition, but without it a container that started successfully — process running, port open — can still be silently serving errors, and nothing upstream will notice until users complain.
Where this leads
Once the image builds cleanly and starts predictably, two questions follow almost immediately: where does the image actually live, and what happens when traffic spikes.
For the first, a private container registry is worth setting up as soon as you're storing anything beyond a hobby project — a private container registry that you control avoids being tied to a single cloud vendor's registry pricing and retention rules.
For the second, standalone output doesn't do anything about scaling on its own — it just makes the artifact small and portable. Actually autoscaling the workload in response to real traffic is a separate layer, and it's the natural next thing to figure out once the container itself is solid.
Once your image is built, the next question is where it lives and how it scales — that's where most standalone-output guides stop short.
Closing thought
None of this requires Kubernetes, or any particular cloud provider — a standalone build runs the same way on a single VM as it does in a large cluster. But as soon as you're running more than one instance, or thinking about zero-downtime deploys, the operational questions multiply fast: registries, rollouts, autoscaling, TLS, monitoring. That's usually the point where teams start asking what it would cost to run this themselves versus the real cost of running it yourself on a managed platform instead.
If you're weighing what happens after the Dockerfile — where images live, how scaling works — Kubo runs standard Kubernetes with that plumbing already in place, closer to Vercel's workflow without locking you into one vendor.